The playmoTV DNS gateway works well with Windows 8.
If you are using multiple Wi-Fi networks you may have to repeat this setup when you change to a new Wi-Fi network.
Setup using the playmoTV Linker
 Just download our brand new playmoTV Windows Linker and you’ll be linked within a few seconds.It’s a great tray app where you can easily link and unlink your device. Get it here
Or setup manually
 From the Home screen move the mouse to the top right corner of the screen and select Search.
 In the search field, type Control and click Control Panel from the results.
 Select Network and Internet.
 Select Network and Sharing Center.
 Click Change adapter settings on the left hand side of the window.
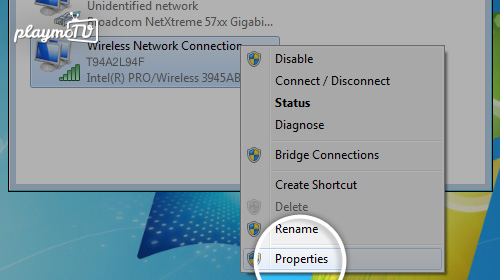 Depending on how you connect to the Internet, select Wireless Network Connection (if you are using Wi-Fi / wireless Internet), or your Local Area Connection (if you are using Ethernet or cable) by right clicking the icon and then select Properties. A new window should open up.
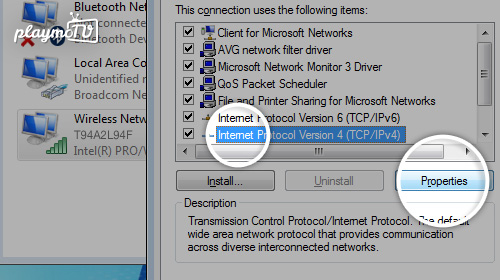 In the new window, select Internet protocol Version 4 (TCP/IPv4) and then click the Properties button to the right.
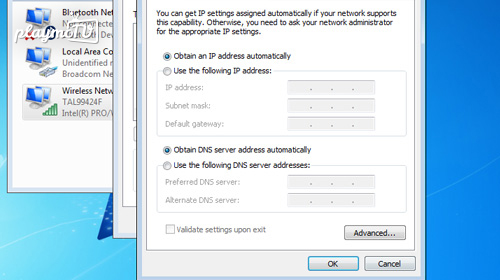 A new window should open up as demonstrated, its called an Internet Protocol window.
-
You need to be logged in to view this part
Already a member?
 Next step is important, you have to restart your computer, open a browser and navigate to the playmo.TV login page. Simple? Yes, we think so.
- If you use Avast Anti-virus, make sure that Secure DNS is not enabled, as that disables the usage of custom DNS servers. Click here for information on how to disable it.